AWS Amplify Console에서 배포시 슬랙으로 알림을 받아보는 방법을 작성해보려고한다.
현재 AWS Amplify Console User Guide 을 보면 이메일 알림을 기본적으로 제공하고, 이를통해 만들어진 SNS 주제를 통해 Slack과 같은 다른 도구에 알림을 보내는 데 활용할 수 있다.
-
Amplify 콘솔을 연다.
-
Email 알림을 설정할 앱을 선택합니다.
-
App settings > Notifications > Manage notifications 을 클릭한다.

-
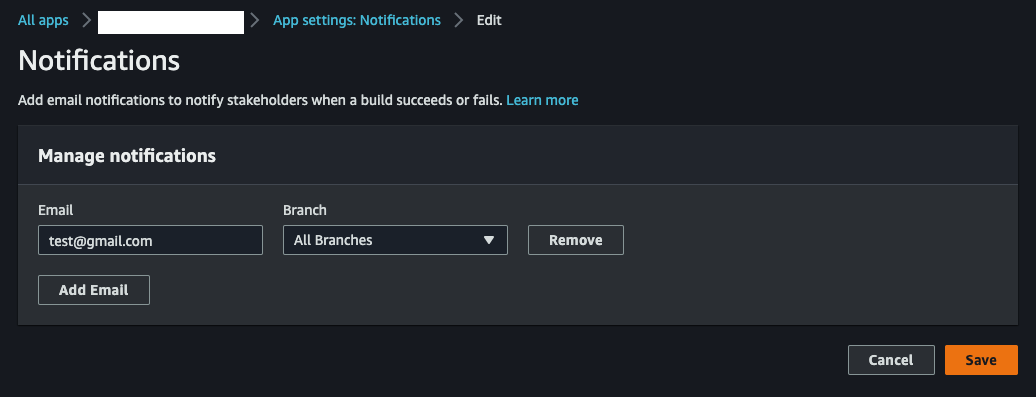
알림을 받을 Email을 입력하고, 배포 알림을 받을 대상 브랜치를 선택 후 Save한다.
-
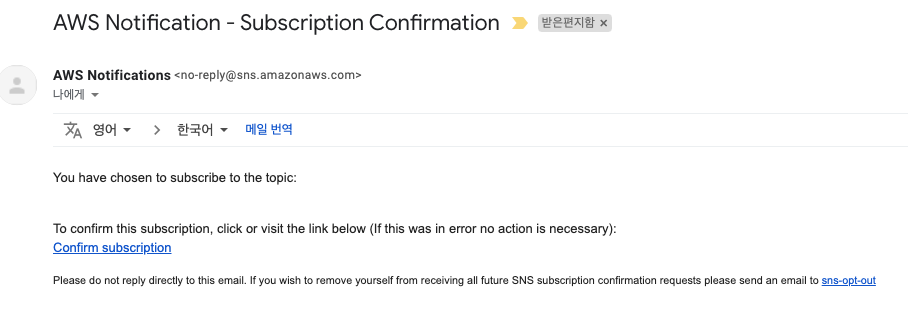
Notifications 페이지로 돌아오면, “We Sent you an email to confirm subscriptions, please click on the link in the email to start receiving notifications." 라는 문구가 뜰 것이다. 4번 과정에서 입력한 Email에 메일 1통이 전송되었을 것이다.

-
Confirm subscription을 클릭한다. Email 인증 과정이라고 생각하면 된다.
-
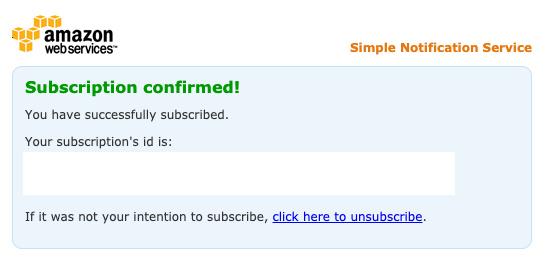
그럼 아래와 같은 팝업창이 뜬다.
-
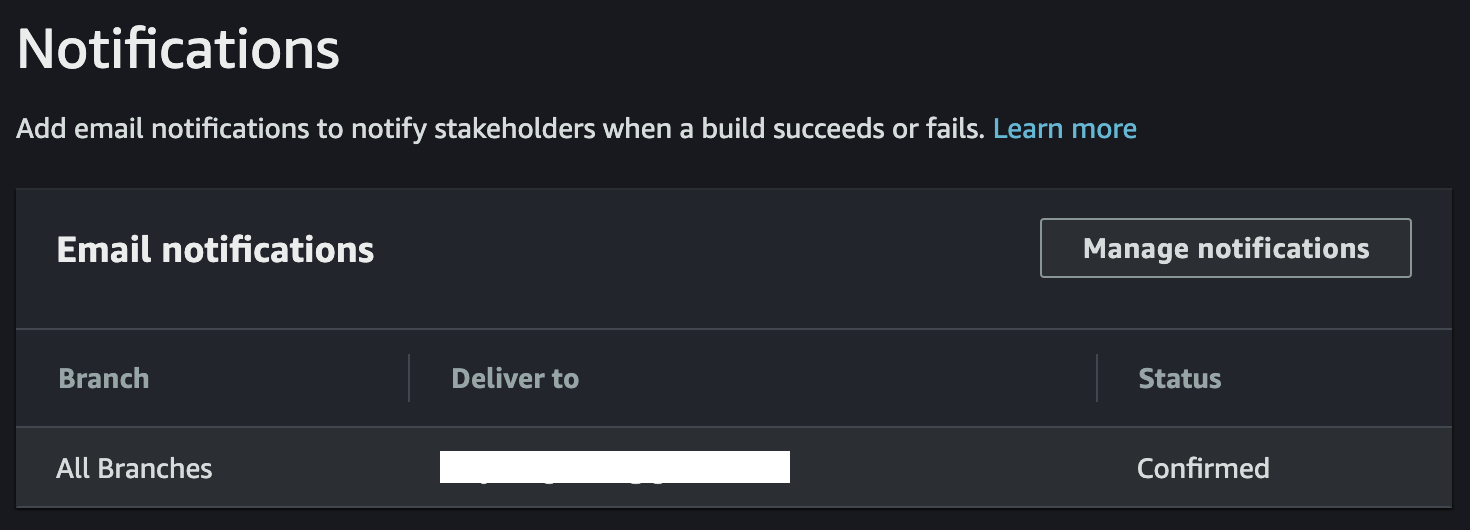
다시 Amplify Console Notifications 창으로 돌아오면 Status가 Confirm으로 바뀐 것을 확인 할 수 있을 것이다.
-
이제 만들어진 SNS를 통해 slack으로 알림을 보내는 작업을 진행해보자.
Amazon SNS > Topics 에 접속하여, Amplify App ID로 검색한다. (App ID는 Amplify Console 앱에 들어갔을 때 url에서 알 수 있다. 또는 App ARN에서 알 수 있다.)

-
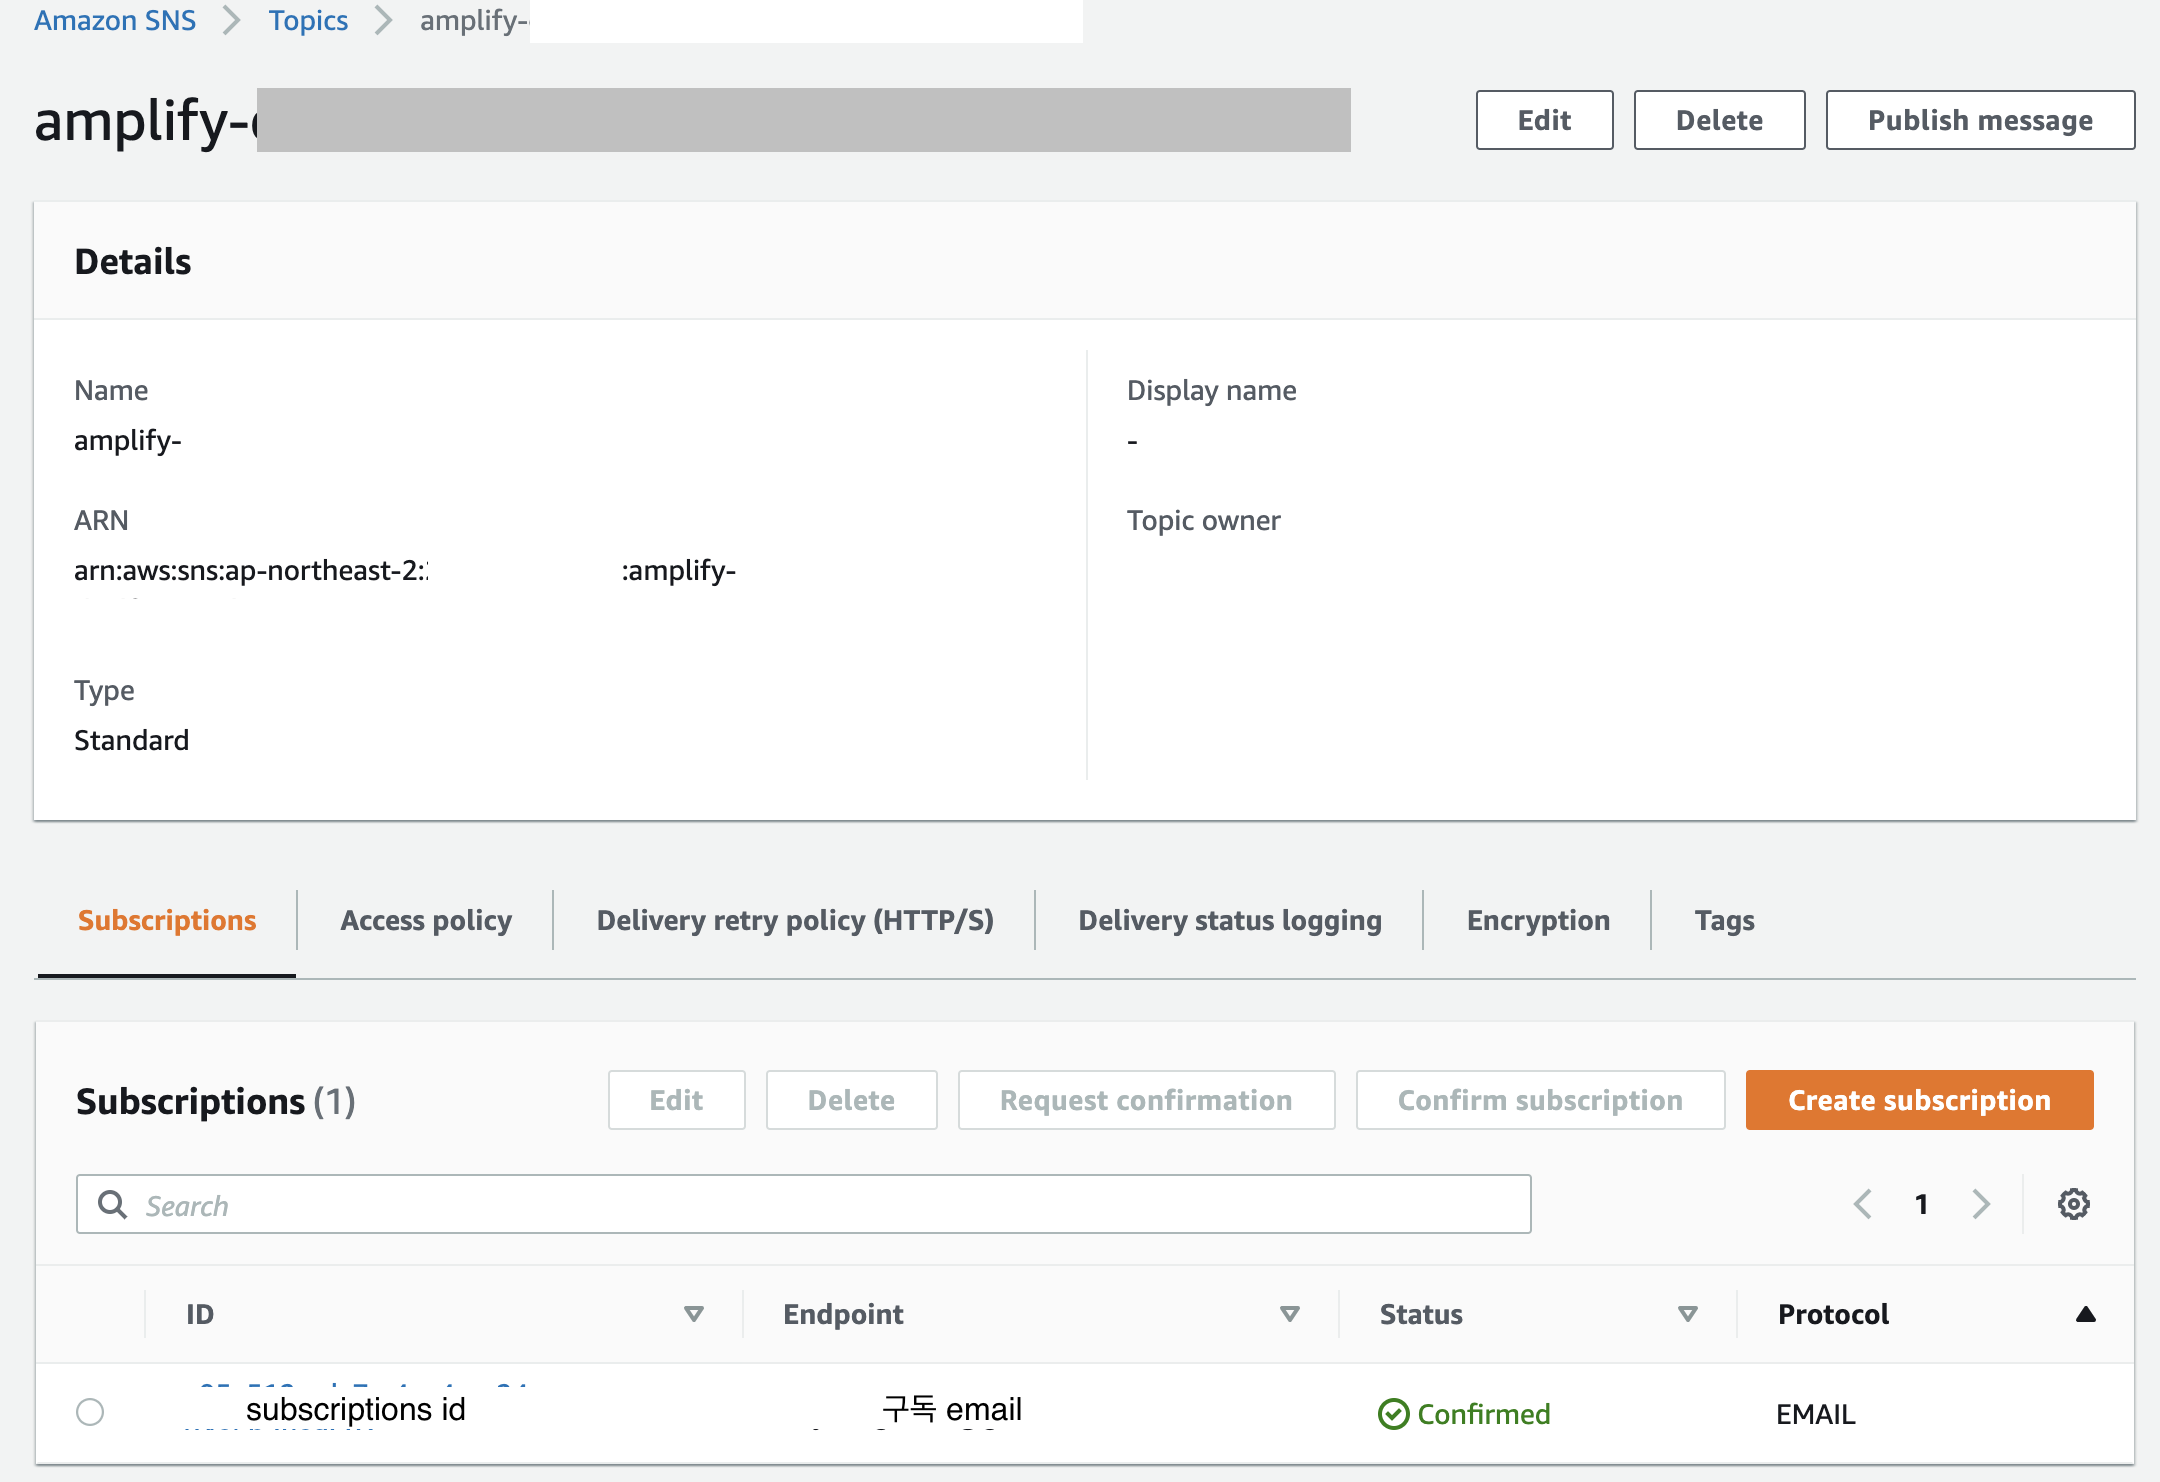
9번 과정에서 검색된 Topic을 선택 후, 클릭한다. email 알림 구독을 확인 할 수 있을 것이다.
우린 slack notification을 추가 할 것이므로, Create Subscription을 클릭한다.
-
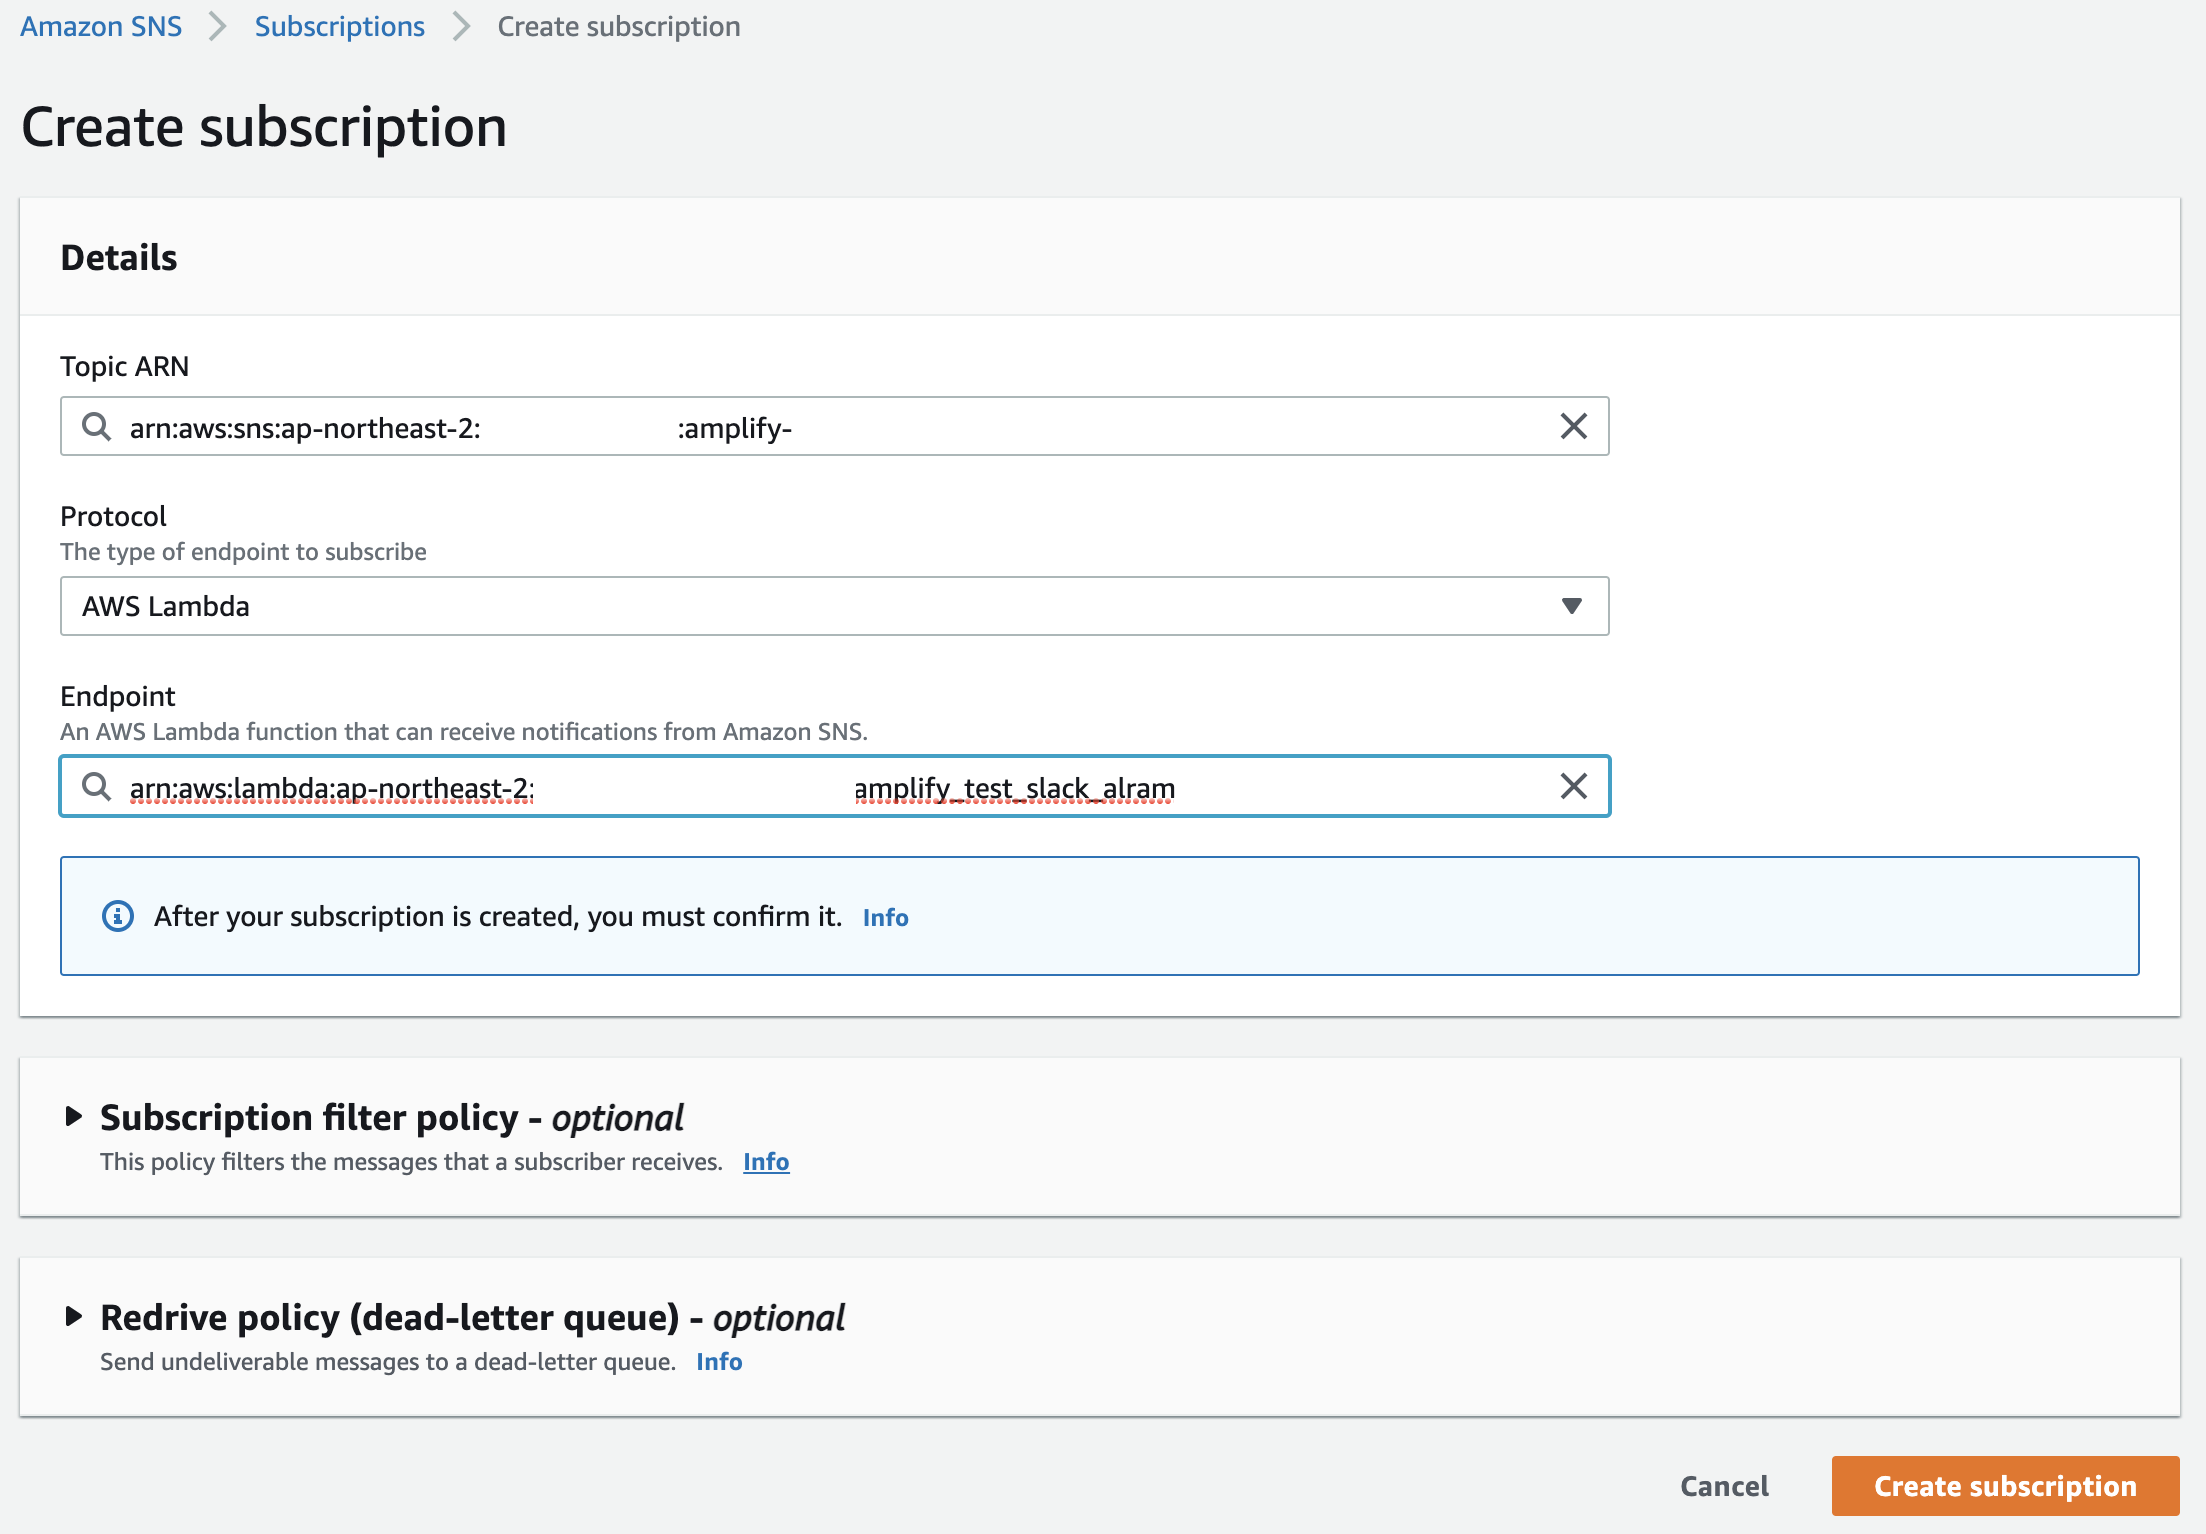
AWS lamdba를 이용하여 Slack webhook을 이용할 것이다.
Protocol로 AWS Lambda를 선택하고, Endpoint로 slack으로 Notification을 보내는 lambda function을 선택한다. (아래 내용 참고: Slack notification Lambda Function)
-
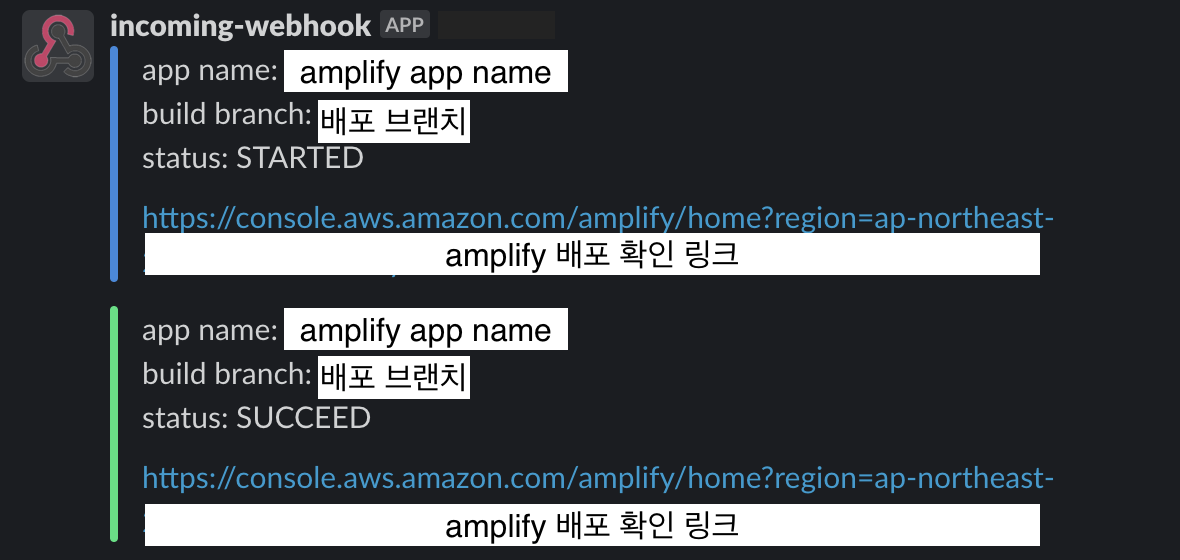
앞으로 Amplify 배포가 일어났을 때, 아래와 같은 알림을 Slack으로 받아 볼 수 있을 것이다.
Amplify SNS Topic Subscription에 추가 할 Lamdba function을 만들어보자.
메일 내용을 통해 필요한 내용만을 추출하여, Slack Webhook을 이용하여 지정한 채널에 알림을 보내주는 것이다.
- 수정이 필요한 값
- {Amplify App id}: Amplify App id를 입력해 준다.
- {Amplify App Name}: Amplify App Name 또는 배포되는 앱이 어떤 것인지 쉽게 알아볼 수 있도록 이름을 넣어준다.
- {slack webhook link}: 알림을 받아 볼 슬랙 채널 WEBHOOK 링크를 넣어준다.
 1
 2
 3
 4
 5
 6
 7
 8
 9
10
11
12
13
14
15
16
17
18
19
20
21
22
23
24
25
26
27
28
29
30
31
32
33
34
35
36
37
38
39
40
41
42
43
44
45
46
47
48
49
50
51
52
53
54
55
56
57
58
59
60
61
62
63
64
65
66
67
68
69
70
71
72
73
74
75
|
const https = require('https');

exports.handler = async (event) => {
	const sns = event.Records[0].Sns.Message;

	let message = '';
    let color = '';

    // email 본문에서 빌드 url만 추출해온다.
    let regex = /(?:(?:(https?|ftp|telnet):\/\/|[\s\t\r\n\[\]\`\<\>\"\'])((?:[\w$\-_\.+!*\'\(\),]|%[0-9a-f][0-9a-f])*\:(?:[\w$\-_\.+!*\'\(\),;\?&=]|%[0-9a-f][0-9a-f])+\@)?(?:((?:(?:[a-z0-9\-가-힣]+\.)+[a-z0-9\-]{2,})|(?:[\d]{1,3}\.){3}[\d]{1,3})|localhost)(?:\:([0-9]+))?((?:\/(?:[\w$\-_\.+!*\'\(\),;:@&=ㄱ-ㅎㅏ-ㅣ가-힣]|%[0-9a-f][0-9a-f])+)*)(?:\/([^\s\/\?\.:<>|#]*(?:\.[^\s\/\?:<>|#]+)*))?(\/?[\?;](?:[a-z0-9\-]+(?:=[^\s:&<>]*)?\&)*[a-z0-9\-]+(?:=[^\s:&<>]*)?)?(#[\w\-]+)?)/gmi;
	let url = sns.match(regex)[1];

	// 빌드 url에서 app id와 build 대상 브랜치를 뽑아온다.
	let appinfo = url.match(/#[a-z0-9\-]*\/[a-z0-9\-]*/gmi)[0].split('/');
	let app_id = appinfo[0].split("#")[1];
	let app_build_branch = appinfo[1];

	// 현재까지 메일 내용만으로 app id를 가지고 app name을 알 수 없다. 추후 개선 방안이 필요.
	if (app_id == '{Amplify App id}') {
		message += 'app name: {Amplify App Name}\n';
	}else {
		message += 'app name: ';
		message += app_id;
		message += '\n';
	}

	message +=  'build branch: ' + app_build_branch + '\n';


	if (sns.includes('build status is FAILED')) {
		message += 'status: FAILED';
		color = '#E52E59';
	} else if (sns.includes('build status is SUCCEED')) {
		message += 'status: SUCCEED';
		color = '#21E27C';
	} else if (sns.includes('build status is STARTED')) {
		message += 'status: STARTED';
		color = '#3788DD';
	}

	message += '\n\n';

	message += url;


	const data = JSON.stringify({
		attachments: [
			{
				'mrkdwn_in': ['text'],
				fallback: message,
				color,
				text: message
			}
		]
	});

	return new Promise((resolve, reject) => {
		// Prepare the request.
		const request = https.request({slack webhook link}, {
			method: 'POST',
			headers: {
				// Specify the content-type as JSON and pass the length headers.
				'Content-Type': 'application/json',
				'Content-Length': data.length,
			}
		}, (res) => {
			// Once the response comes back, resolve the Promise.
			res.on('end', () => resolve());
		});
		// Write the data we generated from above and end the request.
		request.write(data);
		request.end();
	});
};
|
현재까지 Amplify에서 발송해주는 메일 내용만으로 app id를 가지고 app name을 알 수 없다. 그렇기때문에 앱이 추가 될 때마다 람다에 수동으로 직접 조건문을 추가해줘야한다.
이 부분을 개선 할 수 있는 방법이 있을지… 아직 발견하지 못했다.


